de_DE
de_DE
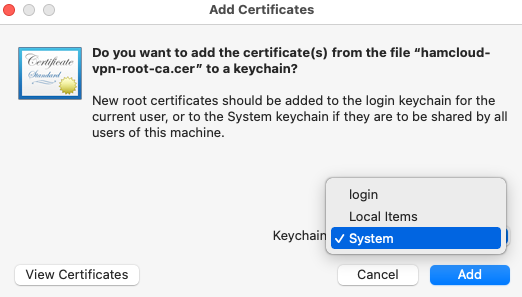
The first step is to import the root certificate of the HamCloud VPN server:
- Download the root certificate here and open it with “Keychain Access”.

- Add certificate to the Keychain “System”.
- In Keychain Access, choose System, select the Certificates tab and double-click the “HamCloud VPN Root CA” certificate.

- Unfold “Trust” and change “IP Security (IPsec)” and “X.509 Basic Policy” to “Always Trust”.
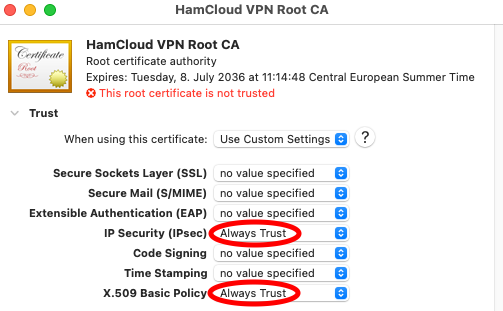
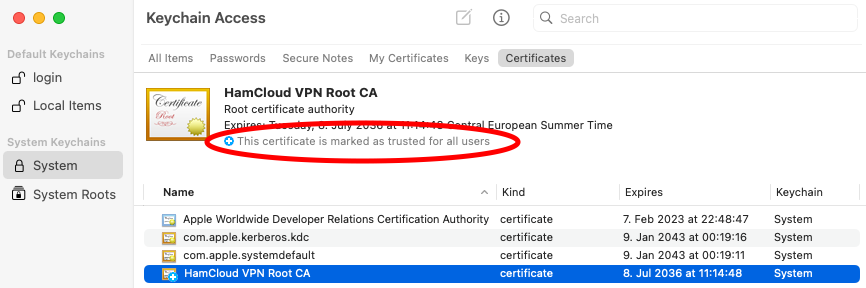
- The certificate is now shown as trusted.
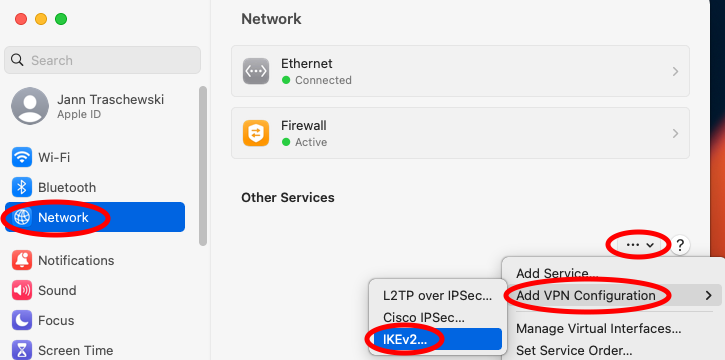
The second step is to create a new VPN configuration:
- Add VPN configuration with type IKEv2 in the network system settings.
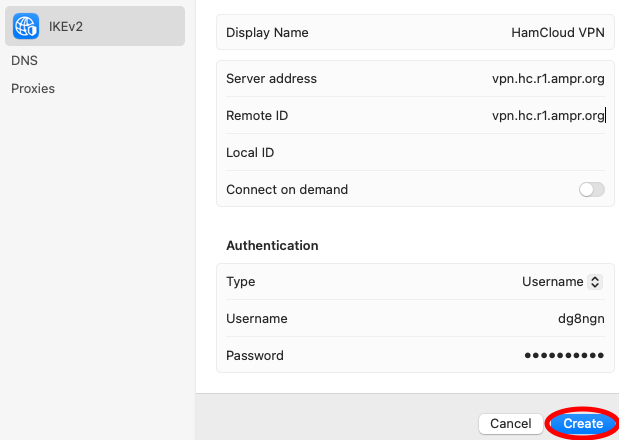
- Create the VPN profile with the following data:
- Display Name: Hamcloud VPN
- Server address: vpn.hc.r1.ampr.org
- Remote ID: vpn.hc.r1.ampr.org
- Type: Username
- Username: <enter username of VPN credentials>
- Password: <enter password of VPN credentials>
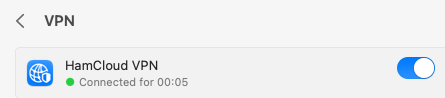
Now the VPN connection can be used:
- Click on the VPN icon.

- Select the HamCloud VPN and activate it.
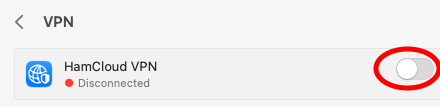
- You are now connected to the HamCloud.